Working with django and python in this tutorial makes some assumptions about pre-requisite comfort with the development of websites in general:
- You know how to connect to files root directories and make new files within that structure
- You have a working knowledge of terminal commands
- You have a grasp of python syntax and some experience using the language
- You have some experience with backend views
- You are comfortable with basic CSS and HTML
- You can troubleshoot and debug if issues come up as you work through the tutorial steps
- You are able to create and maintain an account on Heroku
For django applications, you will need to install python and a tool that creates virtual environments called pipenv. Check your system to see which version of python you have available. You can also check for pipenv by using the following terminal commands:
$ python3 --version
$ pipenv --version
I recommend Python 3.7 or higher for best performance. If you need to install either program use Homebrew to install them globally with these commands:
$ brew install python
$ brew install pipenv
Now you need to create a directory for your project. My application is a simple 'todo' list that I am calling 'honeyDo-django'. Once you make this directory, you will need to cd into it for the next round of installations.
$ mkdir honeyDo-django
OR
You can create a corresponding GitHub repo, initialize it with a README.md, and clone
into it for easy git connection to make the root directory.
$ git clone <REPO URL>
$ cd honeyDo-django/
Now you are going to use pipenv to install locally inside your project. It is important NOT to install these dependencies globally! Also, unlike npm, you will need to type out 'install' as 'i' doesn't work. The first installation will be django itself. The second is a library that will connect django to postgreSQL which will be hosting the database information.
$ pipenv install django
$ pipenv install psycopg2-binary
Now when you open the project in a text editor, you will see two new files have been added: Pipfile and Pipfile.lock. These function as a holding place for all dependencies and works similarly to node_modules, but do not require gitignore. The next step is to start the project itself. Naming convention can make this a little confusing, so be sure to know which directory is the root of the project and which one is the application itself.
$ pipenv run django-admin startproject honeyDo_django .
A few things to notice. First, you can substitute any name for your project after the startproject command, but best practice is to use snake_case for python/django. Second, the . at the end of the command is important so you don't create a sub-folder within the project. Finally, when you return to your text editor, you will see several new files have been created automatically. Now it is time to enter the virtual environment inside the project. Use this command to enter:
$ pipenv shell
You should notice a change in your bash command. Depending on the individual set up, it may explicitly say 'virtual env' or 'env' OR it may put your project name in front of the $. If this command doesn't work, you can also try:
$ source .env/bin/activate
Once inside the virtual environment, you need to create the application files. This time you will not need the . at the end.
$ django-admin startapp honeyDo_app
If django-admin doesn't work for some reason, you can replace it with python3 manage.py as
long as that file exists in the current directory.
Now that all the django files are in place, it is time to switch gears and set up the database. For this project, you will use PostgreSQL, which is a more robust relational database than the default SQLite. If you need to install this locally, please follow installation instructions for PostgreSQL and select the appropriate version for your home machine. Once the application is installed and running, return to the terminal and open a new tab. You do not need to cd into the project to set up this database, but you will need to make note of the values entered since they will need to be inputted into the settings of your django project as well. First use this command to login to PostgreSQL:
$ psql -d postgres
You should enter into a new field within the terminal. The prompt may have '>' or 'postgres=#' to show access to the application. Now, create a database using the following commands: (Please note the uppercase may not be necessary on all operating systems.) PostgreSQL is case sensative and all database names MUST be lowercase. Also note the syntax with 'password' and ; at the end of the commands. You should get confirmation in the terminal after each command is executed. As always, you can change the values of the project to match your application and desired user name and password.
CREATE DATABASE honeydo; CREATE USER honeyuser WITH PASSWORD 'honey';
GRANT ALL PRIVILEGES ON DATABASE honeydo TO honeyuser; \q
Now that the database is created, return to your text editor. Inside the project directory you need
to find (around line 76) and enter the database information into the settings.py file as
follows:
DATABASES = {
    'default': {
        'ENGINE': 'django.db.backends.postgresql',
         'NAME': 'honeydo',
         'USER': 'honeyuser',
         'PASSWORD': 'honey',
         'HOST': 'localhost',
    }
}
You will also need to include the name of the application at the bottom of the INSTALLED_APPS list (around line 33). Please note this must match the name of the directory, NOT the database.
INSTALLED_APPS = [
    'django.contrib.admin',
    'django.contrib.auth',
    'django.contrib.contenttypes',
    'django.contrib.sessions',
    'django.contrib.messages',
    'django.contrib.staticfiles',
    'honeyDo_app',
]
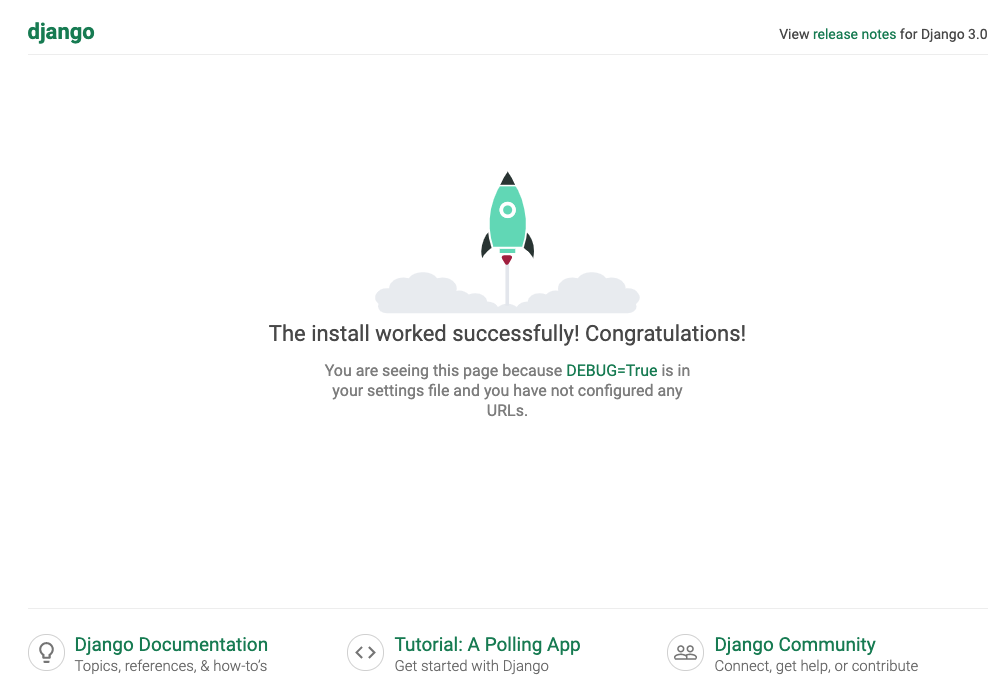
Now, finally, you can run this terminal command and navigate to localhost:8000 to see a welcome Django app page!
$ python3 manage.py runserver
To see a list of commands simply type python3 manage.py or visit djangoproject.com for
full documentation on django-admin/manage.py.
It's time to create the interface that will allow you to generate data for the database. Models are
built using python classes. This class will determine the information you want to be added to each
instance of the model. In this case, I want a model 'Todo' that will hold all the 'todo' items so that
model will need fields for a title, date, and person (who will be doing the list). Since I want to have
many items possible on my single 'Todo' list, I will also need a second model that will have ForeignKey
relationship to the 'Todo' list. Open the models.py file and add the following:
from django.db import models
from datetime import date

# Create your models here.
class Todo(models.Model):
    title = models.CharField(max_length=180)
    date = models.DateField(auto_now=False, auto_now_add=False, default=date.today)
    person = models.CharField(max_length=100)

    def __str__(self):
        return self.title

class Item(models.Model):
    task = models.CharField(max_length=300)
    todo = models.ForeignKey(Todo, on_delete=models.CASCADE, related_name='items')

    def __str__(self):
        return self.task
In order to use this model, it must be migrated to the database. These two commands will not only configure the database information, but also store a record of the work inside the migrations directory in your project. Visit djangoproject.com for the full documentation on migrations. Green OK will indicate everything worked. Now, you can have as many models and fields as you want, but I recommend keeping it simple since this is a relational database and too many relationships will quickly get challenging to manage! (You will need to quit the server before running the commands.)
$ python3 manage.py makemigrations
$ python3 manage.py migrate
One of the reasons I love django is that it comes with an admin authentication that will allow you to access all the CRUD features without needing any other interface. In order to access this feature, you need to create a superuser and password. Unlike the database user/password, keep this information safe and private since it grants access to all the pieces of your app! To set it up, run this command in the terminal and fill out the fields.
$ python3 manage.py createsuperuser
Now, open the admin.py file and add the following code:
from django.contrib import admin
from .models import Todo, Item

# Register your models here.
admin.site.register(Todo)
admin.site.register(Item)
Finally you can access your database! You will need to run $ python3 manage.py runserver in the
terminal first whenever accessing localhost, but once that is running, navigate to
localhost to login and view your app. So far these models can make todo lists and tasks that can be assigned to the lists. However, you will also notice that the
tasks don't show up in the lists. Don't worry, that will come soon when you add the user views to the project.
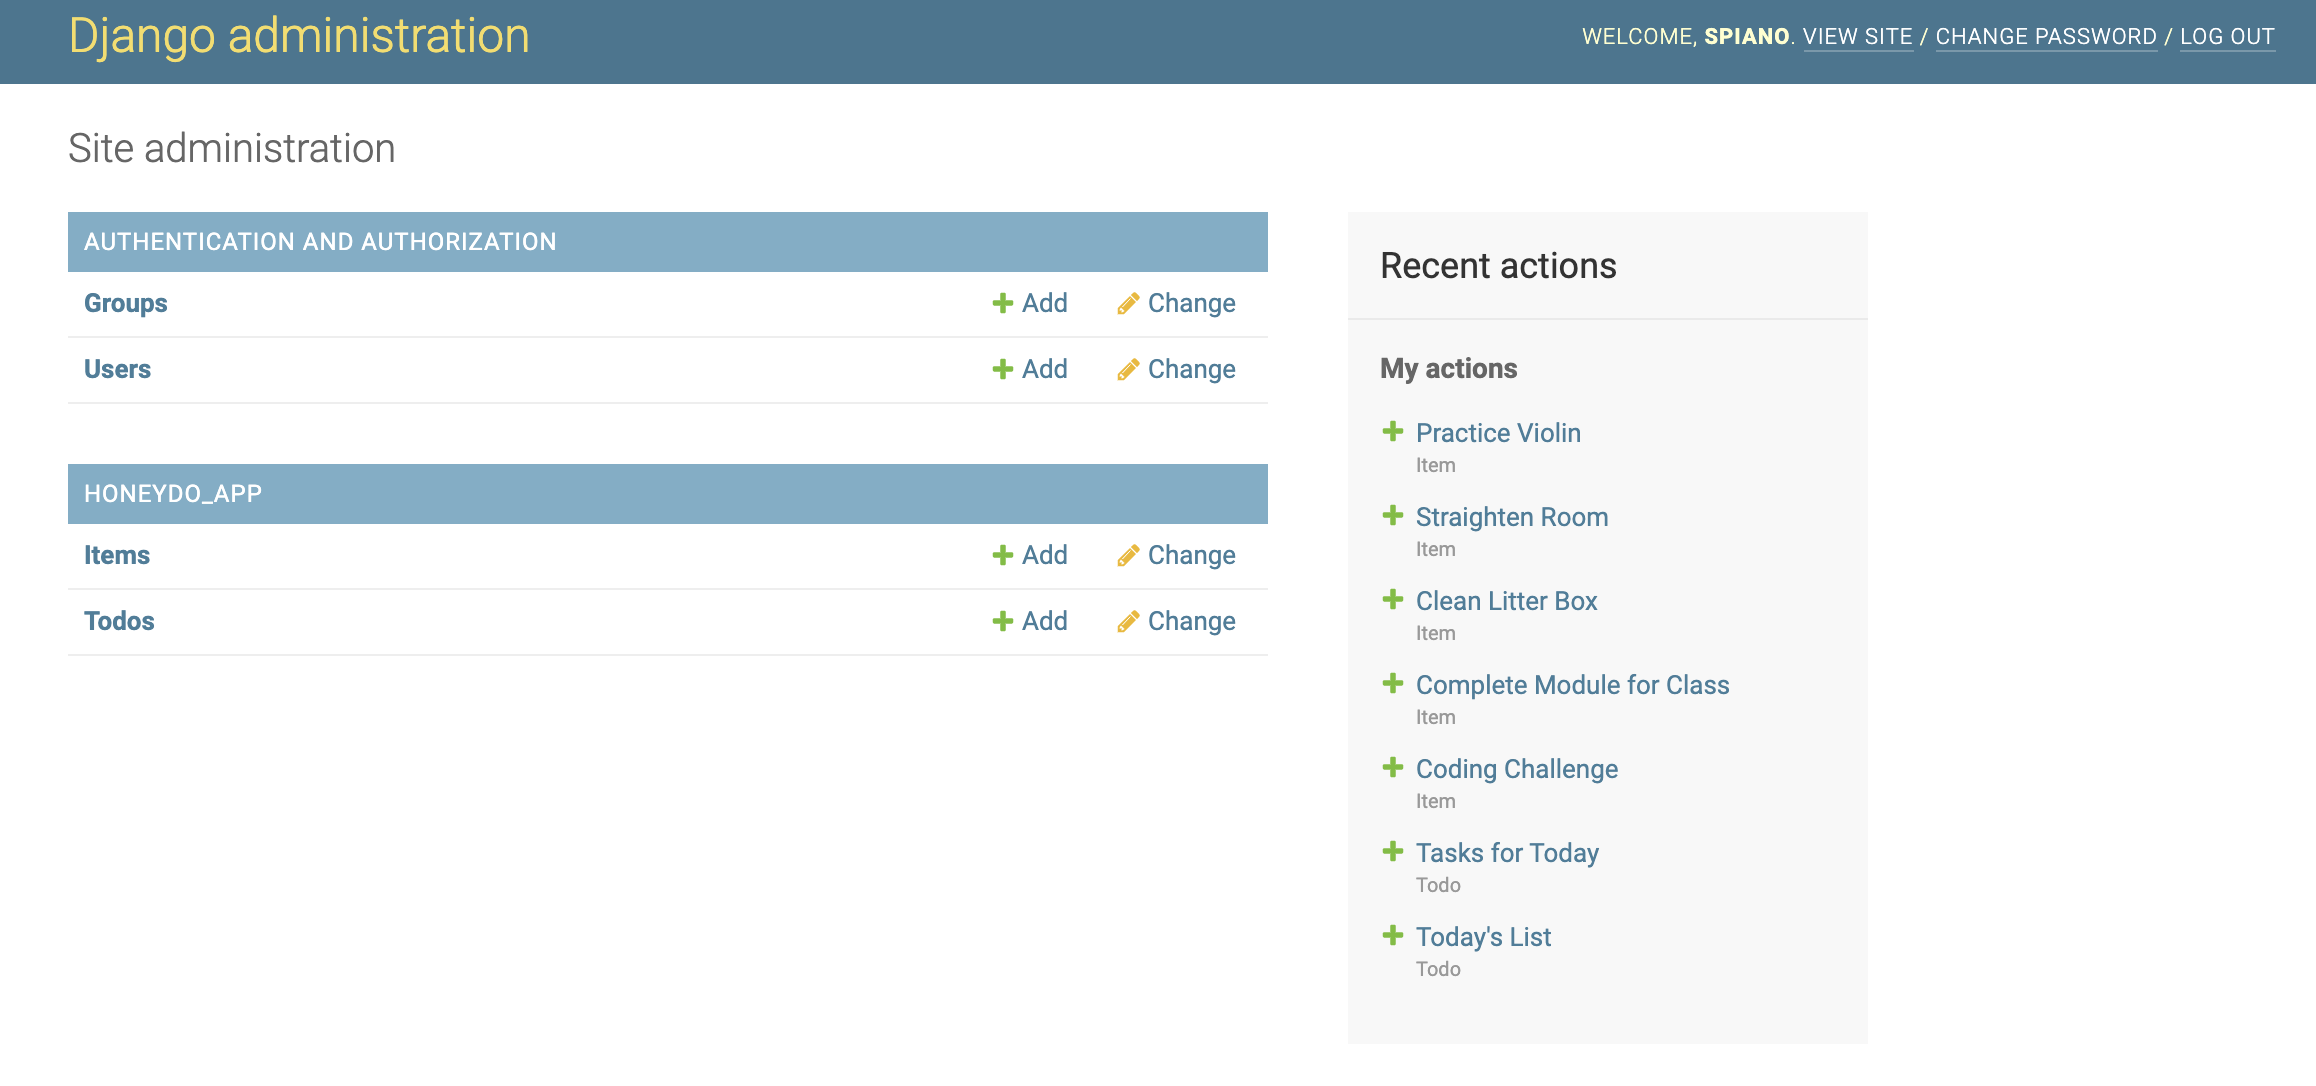
(I love how the datetime automatically adds a mini-calendar to the application! This will come in handy later as well.)
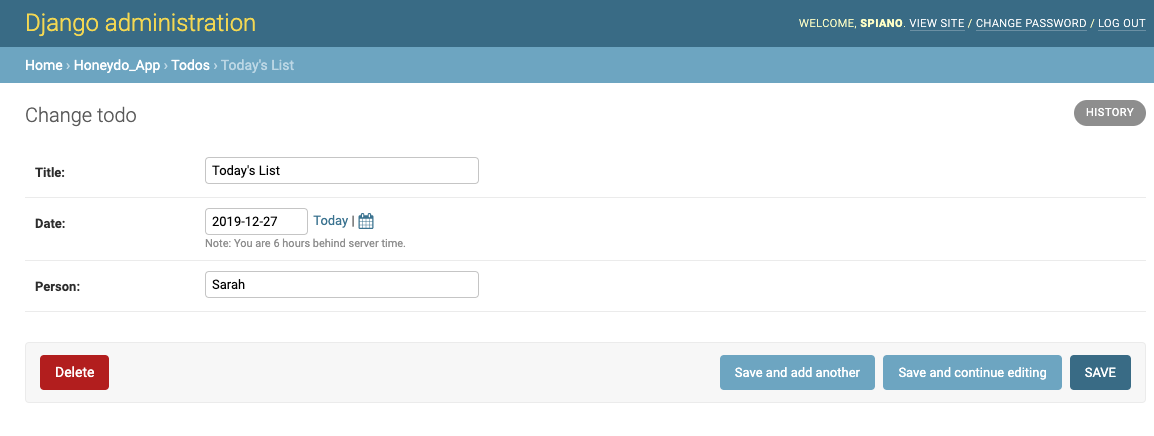
On a side note, you might want to seed your database before doing any of this. If you have data already in place, you can visit djangoproject.com for the full documentation on seed data formats. Definitely take a few minutes to add a couple of entries in both the Items and the Todos so you have something to pull when building out the user interface.
Great! You have a working app, but this isn't terribly practical for a user. Next you will need to
navigate into the views.py file from the application directory. This is where the python code
will create an interface through Django that is similar to HTML pages. Begin by adding the following to
line 2 (under the django.shortcuts import) to access the models:
from .models import Todo, Item
Next, you need to create a python method that will render a list of all the Todo lists created in the admin console. Notice the request is followed by an html page. This will be set up in a moment.
def todo_list(request):
    todos = Todo.objects.all()
    return render(request, 'todo_list.html', {'todos': todos})
Users of this program will want to see one todo list at a time. Note the conversion of id to pk. Id is automatically assigned to JSON data, but pk (primary key) is what is used by the database and django which will be important for building out the html pages.
def todo_detail(request, pk):
    todo = Todo.objects.get(id = pk)
    return render(request, 'todo_detail.html', {'todo': todo})
In order to access these views in the browser, django requires a path to the URL, much like a controller
in Express. Since these are paths connected to the app itself, you will need to create a new file inside
the application directory to hold them called urls.py and you will enter the following code:
(Do not use the urls.py file inside the project directory!)
from django.urls import path
from . import views

urlpatterns = [
    path('', views.todo_list, name = 'todo_list'),
    path('todo/<int:pk>', views.todo_detail, name = 'todo_detail'),
]
Notice the syntax for the two paths created. The url path is first followed by the call to the python
method. The name refers to which html template will be rendered, which is the next step. In this case, the
'homepage' will be the list of all the Todo lists. To make that work, you first need a directory that
will hold all the html files called templates and inside that directory, another new file
labeled base.html. Make sure this file system remains inside the application directory where
the views and urls are also stored so your filing structure looks something like this:
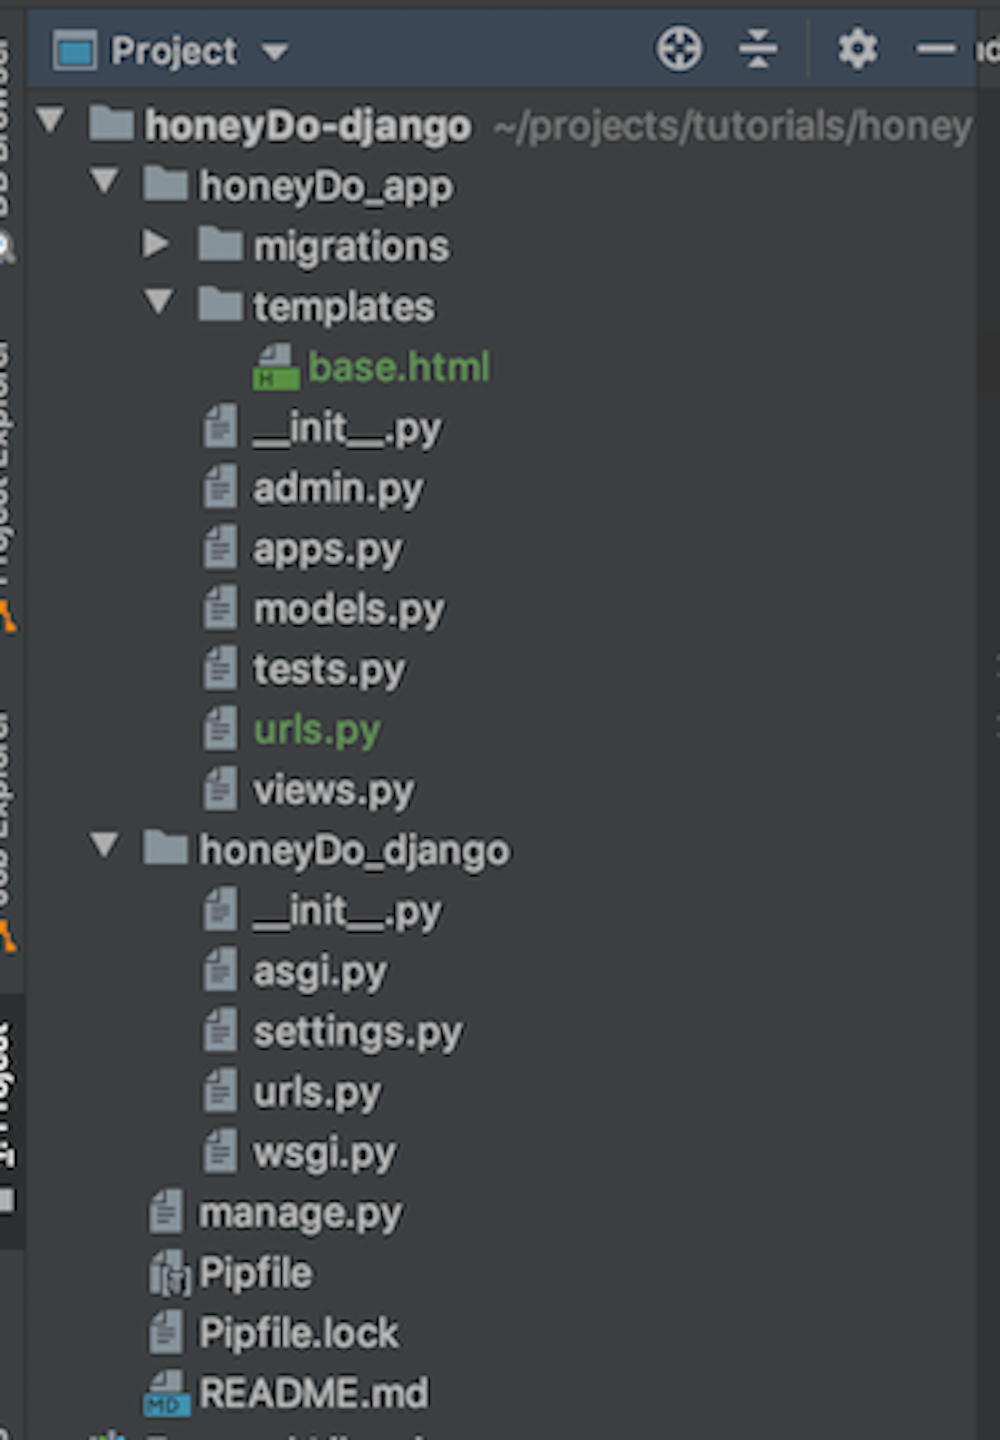
The two green files are the ones just created. Inside that base.html is where the HTML
boilerplate will go. I set up mine to look like this.
<!DOCTYPE html>
<html lang="en">
<head>
    <meta charset="UTF-8">
    <title>HoneyDo-Django</title>
    </head>
<body>
<nav >
    <ul >
        <li ><a href="/">Home</a></li>
    </ul>
</nav>
<div >
    {% block content %}
    {% endblock %}
</div>
</body>
</html>
The stuff inside the curly braces will be how Django connects to the browser. It is very similar to Handlebars (HBS) in Express. Now you need another template for each of the two views, so make these two files inside the templates directory. I find it easier to create these files without a boilerplate since the pages will be loading the content inside the div and copying the base html automatically.
todo_list.html
todo_detail.html
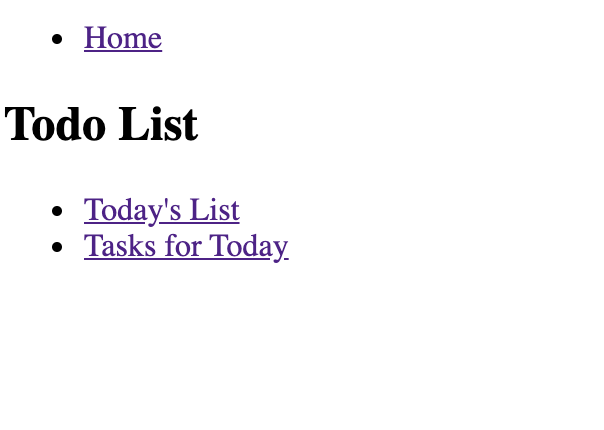
Inside the todo_list.html file, add the following code:
{% extends 'base.html' %}

{% block content %}
<h2 >Todo List</h2>
<div>
    <ul>
        {% for todo in todos %}

        <li >
            <a href="{% url 'todo_detail' pk=todo.pk %}">
                {{ todo }}</a>
        </li>
        {% endfor %}
    </ul>
</div>
{% endblock %}
Let's break down what just happened. The first line extends the boilerplate from the base.html file so all html tags can be used. After that, the content inside the block will be inserted into the body div from the base.html file. This content includes an h2 title followed by an unordered list of all the Todos from the data entered earlier in the admin console. To list them, Django needs a 'for' loop. Notice the list items holds a reference to the todo_detail. This link gives the user access to each individual Todo list according to the primary key number it has been assigned by Django.
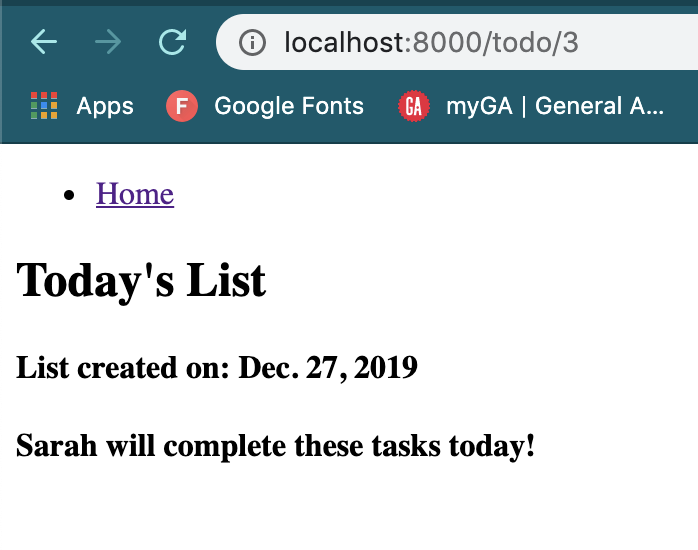
Now you need something similar in the todo_detail.html file.
{% extends 'base.html' %}

{% block content %}
<h2 >{{todo.title}}</h2>
<div>
    <h4>List created on: {{todo.date}}</h4>
    <h4>{{todo.person}} will complete these tasks today!</h4>
</div>
{% endblock %}
Using dot notation inside the double {{}} you can access all of the fields from the Todo model. I created additional text for clarity, but feel free to add anything you wish.
The final step before revisiting the localhost is to add all these application paths to the urls .py
file inside the project directory by importing 'include' and adding the app urls. If you changed the name of your application, make sure the
file name matches the include path.
from django.contrib import admin
from django.urls import path
from django.conf.urls import include

urlpatterns = [
    path('admin/', admin.site.urls),
    path('', include('honeyDo_app.urls')),
]
Once again start up the server with $ python3 manage.py runserver , hope there aren't any
errors, and navigate to localhost to see your work. The home page should
look something like this:
The single Todo list should look similar to this:
Notice that the items attached to the list still aren't visible. Let's fix that. Go back to the
views.py file. Right now there are only methods for viewing the Todo model so you need to
repeat the process for the Item model in order to access the tasks. First make the list and detail views
by adding this code under the existing lines:
def item_list(request):
    items = Item.objects.all()
    return render(request, 'item_list.html', {'items': items})

def item_detail(request, pk):
    item = Item.objects.get(id = pk)
    return render(request, 'item_detail.html', {'item': item})
Next you need to make matching application paths in the urls.py file inside the application
directory. Enter the next two paths under the 'todo/<int:pk>' entry. Make sure to have commas after
each url!
path('items/', views.item_list, name = 'item_list'),
path('item/<int:pk>', views.item_detail, name= 'item_detail'),
Now create two new html files in the templates directory with the corresponding item names. Inside the item_list.html file, add the following:
{% extends 'base.html' %}

{% block content %}
<h2 >Item List</h2>
<div>
    <ul>
        {% for item in items %}

        <li >
            <a href="{% url 'item_detail' pk=item.pk %}">
                {{ item }}</a>
        </li>
        {% endfor %}
    </ul>
</div>
{% endblock %}
This created a simple list with links to each item in the same way you made the Todo list. Inside the
item_detail.html file, add something like what is below. Feel free to be creative when
adding information to make it clear to the user what is being accessed on each page.
{% extends 'base.html' %}

{% block content %}
<h2>{{item.task}}</h2>

{% endblock %}
In order to see what you just did, you have to manually add '/items' after navigating to your localhost. Having a link to each item only to display the name of the task isn't terribly useful, for this application, but when there are more fields tied to the foreign key this step is essential. Have a look at another Django application, lessonKeeper, I created for a more complicated example of this .
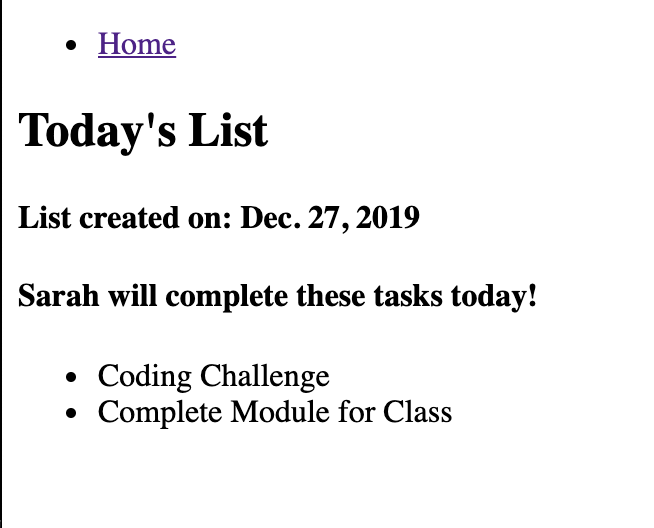
All this work still doesn't link the todo and items, but the framework is there so you can now access the
Item model. Return to the todo_detail.html file and enter this new loop after the second 'h4'
tag:
<ul>
{% for item in todo.items.all %}
<li>{{ item.task }}
<br/> </li>
{% endfor %}
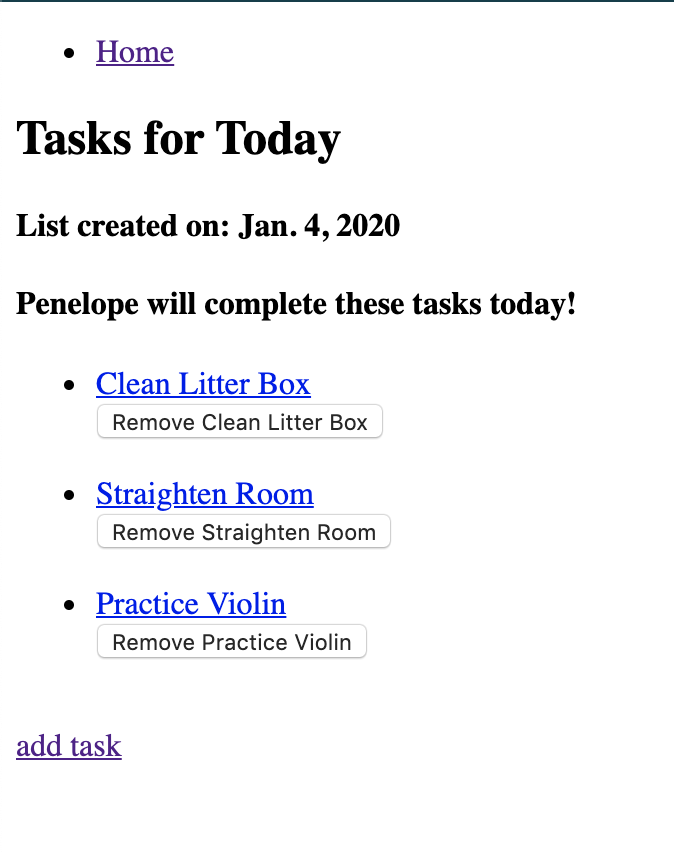
</ul>Refresh the browser and the page will now display a bullet list of the tasks!
Now that the user can read all the data, you need to add a form so users can create new todos from the
browser. Make a new forms.py file in the application directory. At the top of the file you
need to import forms and the two models using this code:
from django import formsfrom .models import Todo, Item
Now you will make the form itself. The syntax is very similar to the model and you want to be sure all the fields are present or you won't be able to add that piece of the data to the new todo. Also not the dangling , inside the fields data.
class TodoForm(forms.ModelForm):

    class Meta:
        model = Todo
        fields = ('title', 'date', 'person',)

class ItemForm(forms.ModelForm):

    class Meta:
        model = Item
        fields = ('task', 'todo',)
Next you need to create an html page for each form. Let's start with the todo form. In the templates
directory, create a todo_form.html file. Inside that file add this code:
{% extends 'base.html' %}

{% block content %}
<h1>Honey Todo</h1>
<form method="POST">
    {% csrf_token %}
    {{ form.as_p }}
    <button type="submit">Save</button>
</form>
{% endblock %}
Let's break down what just happened. The python code we added in forms.py will automatically
generate this form for us! All you need to have is the type of method used: POST, and Django does the
rest. This form is created as paragraphs, but if you would like more flexibility, there is much more
information on djangoproject.com
about how to change the data fields. My favorite piece about the django forms is the built in use of
'csrf_token' that lends some security to the form without any extra effort on your part.
Before you can see this new form in the browser, you need a bit more code. Return to the views
.py file in the application directory. On the top line you must add , redirect to the
django shortcuts. This will allow you to redirect to a different page after submitting the data from the
form. Also, on line three, you must import the forms by adding from .forms import TodoForm,
ItemForm
I prefer to organize all my methods by model, so I will add the next piece between the todo_detail and item_list. However, the application will also work if you continue to add code to the bottom of the page.
def todo_create(request):
    if request.method == 'POST':
        form = TodoForm(request.POST)
        if form.is_valid():
            todo = form.save()
            return redirect('todo_detail', pk=todo.pk)
    else:
        form = TodoForm()
    return render(request, 'todo_form.html', {'form': form})
This method creates a form, checks for the validity of the form, saves the data, and redirects the user
back to the individual page for the new todo item. Now you need to add a path in the application
urls.py file so the browser will render the form. Simply add path('todo/new',
views.todo_create, name = 'todo_create'), on line 9.
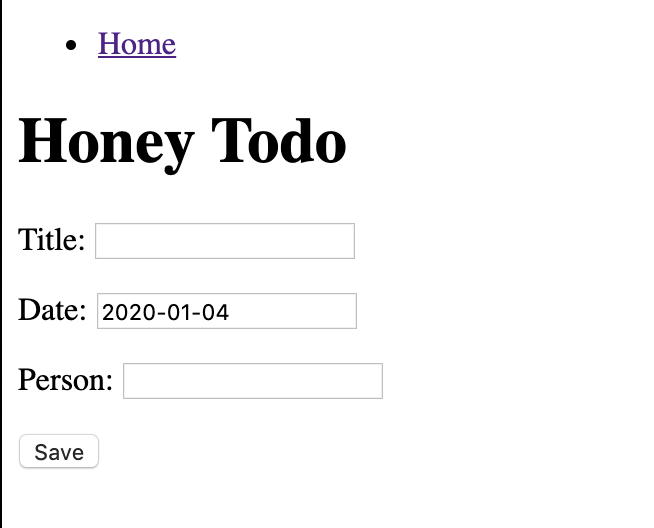
That last piece should allow you to return to the browser and view your New Todo form. Notice again the missing tasks from the
form above. To add them, repeat the process of adding the item_form.html file, making a create for the Item
model in views.py, and adding path('item/new', views.item_create, name = 'item_create'), to the urls.py file in the application
directory. Remember localhost will need to have '/item/new' added
manually to view this form.
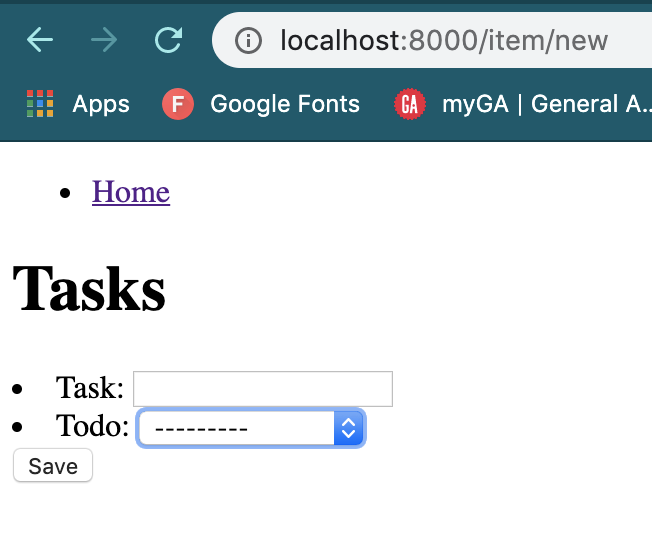
Notice the drop down menu that is automatically added to this form? That is the foreign key
relationship at work! Now typically, there is more data when building out
two separate html pages of forms, however, I felt it was important to give the full detail so this
tutorial could be applied to future, more complex projects. The only other addition that will help the
user is to add this 'New Todo' to the navigation bar in the base.html file.
<li><a href="/todo/new">New HoneyDo</a></li>
In some cases it may be helpful to convert the data into json pieces to make it easier for front end technologies to 'talk' to the backend parts. A serializer also allows data to be validated and works with the form data you just entered to do that. None of this is necessary for this application, but visit Django REST Framework to see the documentation.
The current format for creating new forms is terribly impractical for the user so we will add the link to tasks through the update feature of the todo form. The tricky piece is that the tasks cannot function independently of a primary todo list, so the todo must be created first.
To start this process, you need to add an update method to the views.py file. This is very
similar to the create method and will actually redirect to the same form as before.
def todo_update(request, pk):
    todo = Todo.objects.get(pk=pk)
    if request.method == "POST":
        form = TodoForm(request.POST, instance=todo)
        if form.is_valid():
            todo = form.save()
            return redirect('todo_detail', pk=todo.pk)
    else:
        form = TodoForm(instance=todo)
    return render(request, 'todo_form.html', {'form': form})
Now, the browser needs the update path in the application urls.py file. For this path, you
are going to enter a combination of the pk code and the word 'update' by entering
path('todo/<int:pk>/update', views.todo_update, name = 'todo_update'), under the list of
current paths. These additions should allow you to navigate to localhost and view the update form. Notice the
page looks identical to the 'new' todo page. The only difference is this form has the
information already entered. To update, simply change the text and hit submit. Unfortunately, the tasks
are still missing. Return to the views.py file and enter the update item method:
def item_update(request, pk):
    item = Item.objects.get(pk=pk)
    if request.method == "POST":
        form = ItemForm(request.POST, instance=item)
        if form.is_valid():
            item = form.save()
            return redirect('item_detail', pk=item.pk)
    else:
        form = ItemForm(instance=item)
    return render(request, 'item_form.html', {'form': form})
Then add the item update path to the application urls.py file, again creating the path at the
end of the list.
path('item/<int:pk>/update', views.item_update, name = 'item_update'),
Visit localhost to see this form at work.
Again, this isn't super user friendly, so for the
purpose of this particular project, we are going to make a few small changes. Start with the
views.py file. We are going to change the redirect for the Item create and Item update to the
todo_detail.
def item_create(request):
    if request.method == 'POST':
        form = ItemForm(request.POST)
        if form.is_valid():
            item = form.save()
            return redirect('todo_detail', pk = item.todo.pk)
    else:
        form = ItemForm()
    return render(request, 'item_form.html', {'form': form})

def item_update(request, pk):
    item = Item.objects.get(pk=pk)
    if request.method == "POST":
        form = ItemForm(request.POST, instance=item)
        if form.is_valid():
            item = form.save()
            return redirect('todo_detail', pk = item.todo.pk)
    else:
        form = ItemForm(instance=item)
    return render(request, 'item_form.html', {'form': form})
Next we need to return to the todo_detail.html file in the templates directory to add a link
to the item form. Below the closing div tag, add this line of code:
<a href="{% url 'item_create' %}">add task</a>
Great! Now that we can add an item to the todo, we will want to be able to update the current list as well. The easiest way is to make each list item a clickable link like this:
<ul>
        {% for item in todo.items.all %}
        <li><a href="{% url 'item_update' pk=item.pk %}">{{ item.task }}</a>
        <br/> </li>
        {% endfor %}
</ul>
The final piece of this section is adding the ability to delete an Item or the entire Todo list. Again
start with creating the methods to do this in the views.py file.
def todo_delete(request, pk):
    Todo.objects.get(id=pk).delete()
    return redirect('todo_list')

def item_delete(request, pk):
    item = Item.objects.get(pk=pk)
    parent_id = item.todo.pk
    item.delete()
    return redirect('todo_detail', pk = parent_id)
In order to return to the todo detail page, you must first save the parent_id because once that child id
is deleted, nothing in the database that was attached to it will be accessible anymore. Now add the
paths to the bottom of the list in the application urls.py file.
path('todo/<code>/delete', views.todo_delete, name = 'todo_delete'), path('item/<int:pk>/delete', views.item_delete, name = 'item_delete'),
In formatting the browser, let's make the delete form for the tasks a little more 'fancy' by attaching it
to each item in the for loop we made earlier. Add the code below to the todo_detail.html page in
the templates directory.
 <ul>
        {% for item in todo.items.all %}
        <li><a href="{% url 'item_update' pk=item.pk %}">{{ item.task }}</a>
            <form action="{% url 'item_delete' pk=item.pk %}" method="POST">
                {% csrf_token %}
                <input type="submit" value="Remove {{item.task}}">
            </form>
        <br/> </li>
        {% endfor %}
    </ul>
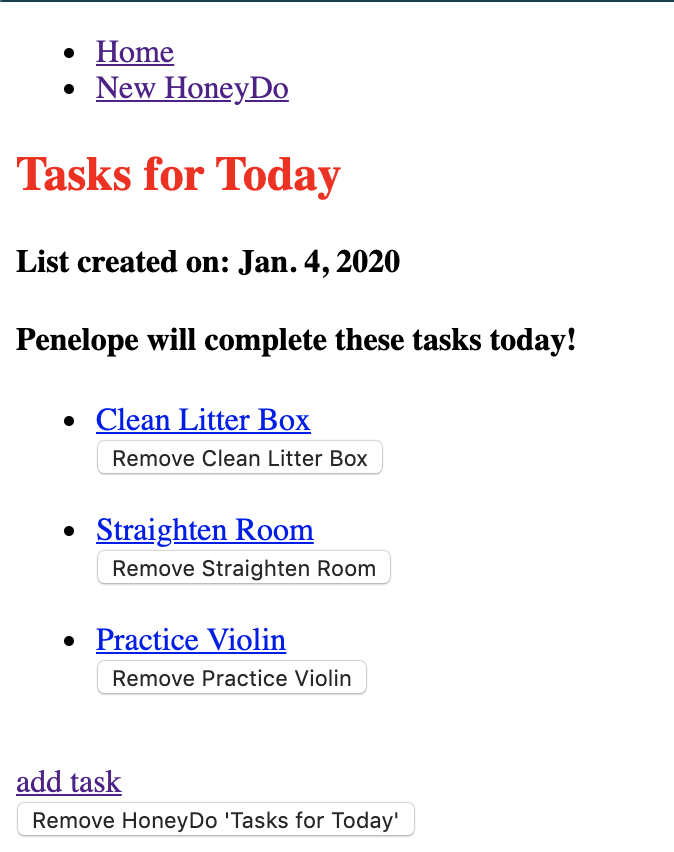
Now when you navigate to a Todo list from your localhost, notice how the delete button includes the name of the task to avoid user confusion.
The last piece is to enable an entire Todo to be deleted. Remember back in the Models
when you created that 'CASCADE' piece in the foreign key? That is what will delete not only the Todo
list, but any and all tasks associated with the Todo. If this was missing, pressing the delete button would
throw an error. Placement of these delete forms can be at your discretion, but I think it makes the most
sense for the user to delete the Todo from the todo_detail.html page just above the endblock
line of code.
<form action="{% url 'todo_delete' pk=todo.pk %}" method="POST">
    {% csrf_token %}
    <input type="submit" value="Remove HoneyDo '{{todo.title}}'">
</form>So now that the application has full CRUD, time to add a bit of style! The most important part of this
section is connecting the stylesheet. After that, the sky is the limit as far as the end 'look' of your
application. The first step is to create another new directory called static in the application
directory. Inside this new file, create your style.css stylesheet. I will often change
something generic to be sure the file is connected, so inside this file I will add:
h2 {
    color: red;
}
Before you can see this change, you need to return to the base.html file. At the top of the
file, just below the doctype on line 2 add:
{% load static %}
Now you can link the stylesheet from the head of the boilerplate just like a 'regular' HTML file, but with one small difference:
<link rel="stylesheet" href="{% static 'style.css' %}">
Finally, at the very bottom of the settings.py file inside of the project directory, you
will see a place for static files. Add this to enable connection to the application:
STATICFILES_DIRS = (
  os.path.join(BASE_DIR, 'honeyDo_app/static'),
)
Now those 'Tasks for Today' should be in bright red and you know the stylesheet is linked. Feel free to add classes and customize to your heart's content. I've included this link to my finished stylesheet if you want to copy it! (The background was made by my daughter so you will need to fill that piece with something else.)
Finally, the application is complete and looking good so it is time to publish it so others can see what you've made. If you don't already have a Heroku account, set one up first. Also, since Heroku uses Git to deploy, make sure you have saved your application in GitHub. Heroku requires some additional files and dependencies, so return to the terminal and make sure you are in the root directory of the project before running the following code:
$ pipenv install django-cors-headers$ pipenv install gunicorn$ pipenv install whitenoise$ pipenv install dj-database-url$ pipenv install django-heroku$ pipenv install python-decouple
It's important to install all the dependencies first so you don't have to update the requirements file you
will be adding next. Create a requirements.txt file by running the following code from your virtual environment.
pip freeze > requirements.txt
When you open this file, there are a few extras created automatically, and should look like this:
asgiref==3.2.3
dj-database-url==0.5.0
Django==3.0.2
django-cors-headers==3.2.1
django-heroku==0.3.1
gunicorn==20.0.4
psycopg2==2.8.4
psycopg2-binary==2.8.4
python-decouple==3.3
pytz==2019.3
sqlparse==0.3.0
whitenoise==5.0.1
Next create a Procfile in the root directory of your project. (This file should be at the
same level as your Pipfile and requirements.txt files.) Inside the Procfile enter:
web: gunicorn honeyDo_django.wsgi
Notice that the name you use is the project directory name and NOT the application name.
Back in the settings.py add the cors middleware above the common middleware (around line 53) and
be sure to add cors to the installed apps (around line 47) so everything will talk in production.
'corsheaders','corsheaders.middleware.CorsMiddleware',
It is recommended to change the debugging setting to 'False' for production, but for some reason my application would only display with this setting as 'True'. I have no explanation for this but tried it several times to no avail, however, since my deployment is working, I am not going to change mine!
Staying in the settings.py file, find the 'secret key' around line 23.
Enter the following code so this key can be protected after publication. Be sure to erase the secret key
from the settings before you deploy, but save that information so you can enter it into Heroku!
SECRET_KEY = os.environ['SECRET_KEY']
Ok, everything should be configured so return to the terminal and in the root directory of the project create a Heroku application. (Make sure to add a lowercase name or Heroku will automatically assign something random and you will be stuck with a weird http address!)
$ heroku create honeydo-app
Next connect a PostgreSQL database (and remember if you seeded it from the admin it will register as an empty database on Heroku.)
$ heroku addons:create heroku-postgresql:hobby-dev
I found that the static files have posed issues in the past so you may need to run this in the terminal to get your Heroku application to deploy properly:
$ heroku config:set DISABLE_COLLECTSTATIC=1
The last step is to push everything to Heroku which will officially deploy your application! (Make sure your application is up to date in your regular GitHub first.)
$ git push heroku master
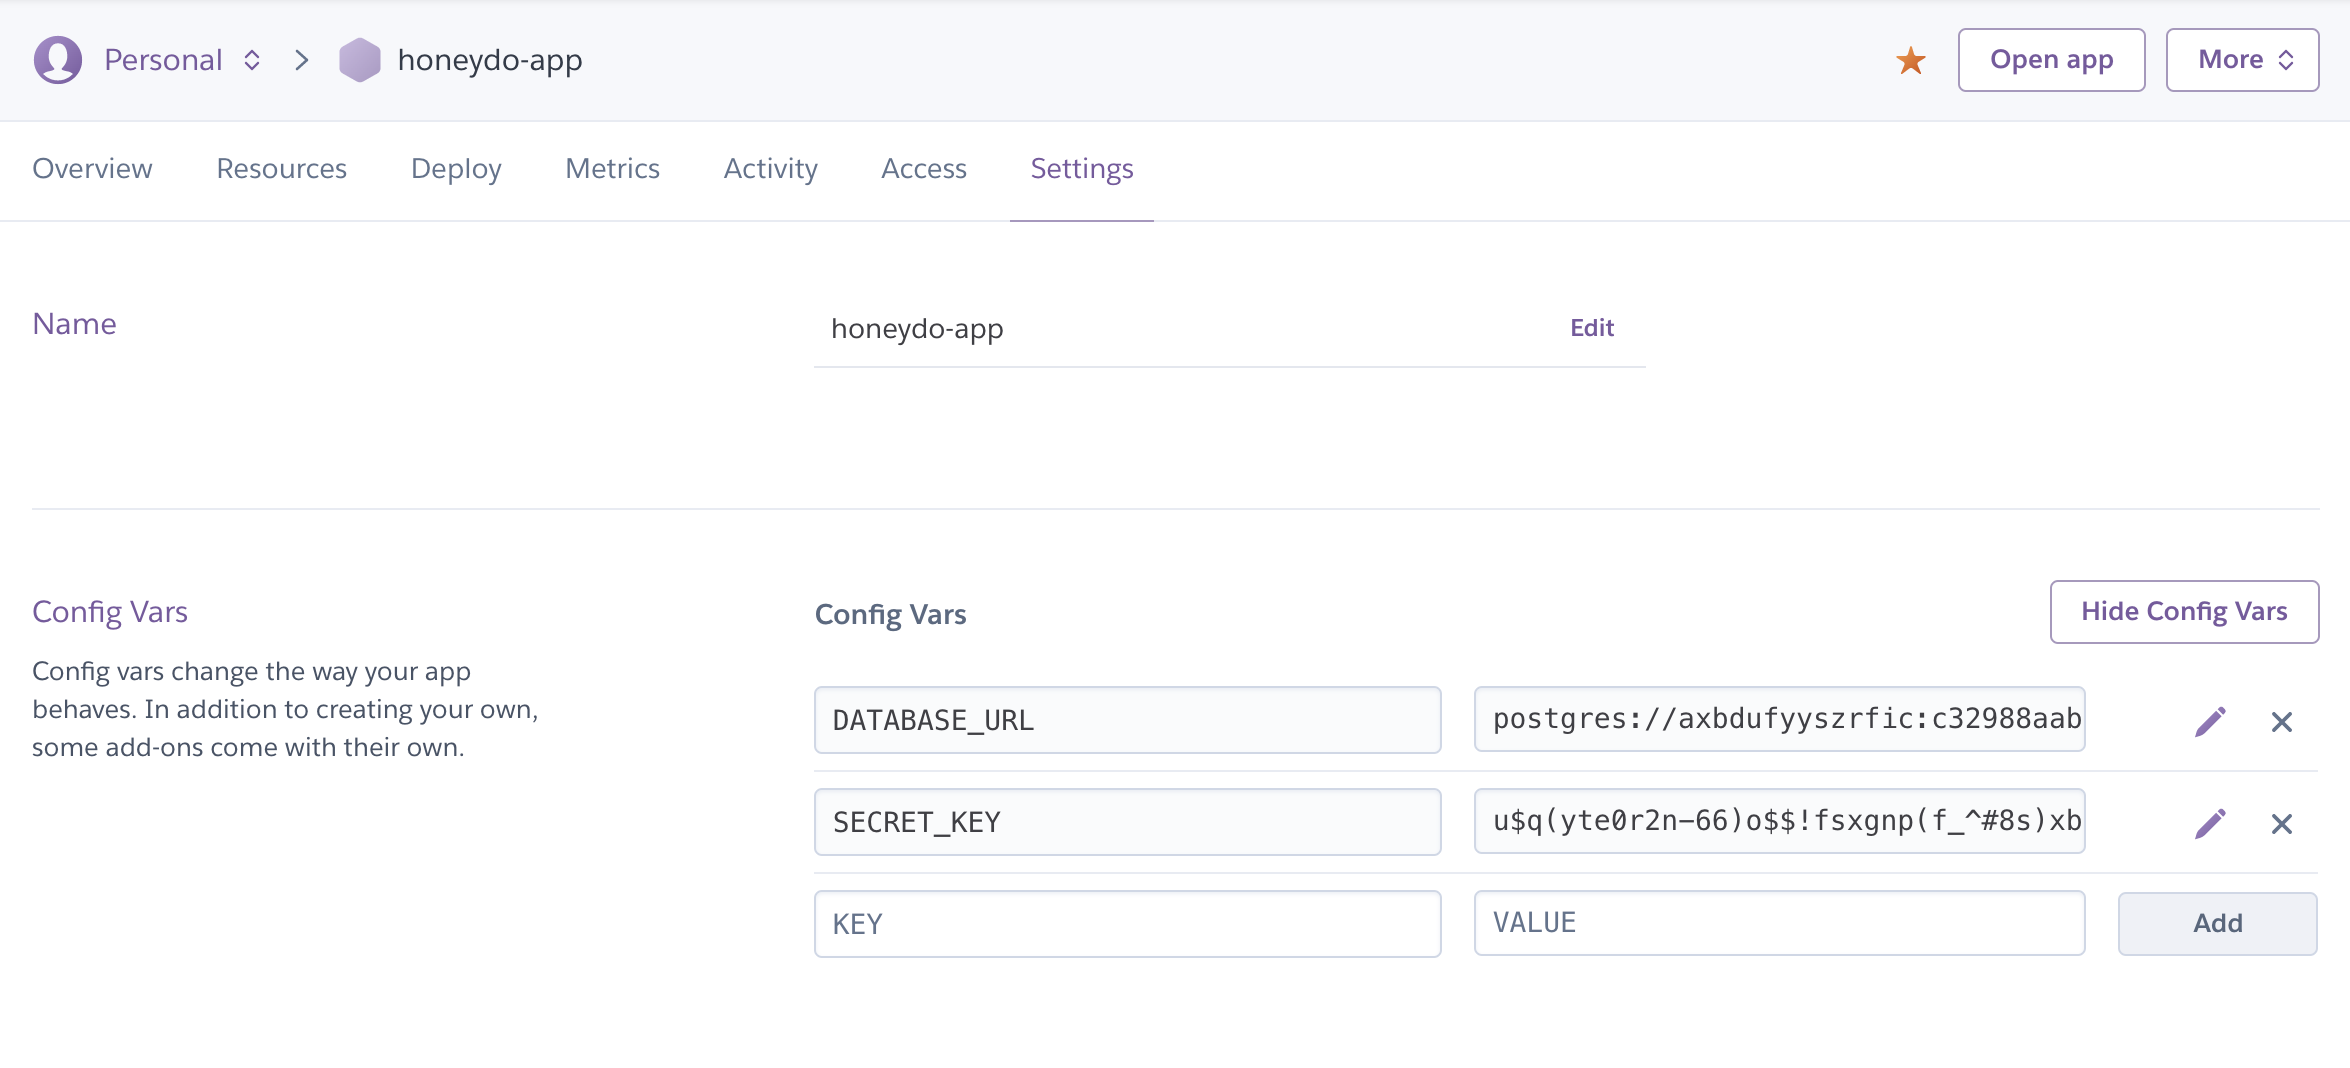
Now navigate to your Heroku account and view the application you
just created by selecting
it. Go to
settings and select 'Reveal Config Vars' so you can add your secret key from the settings.py file under the
database.
You will need to migrate the models to Heroku just like you did with the localhost, so run this code from the terminal after pushing to heroku master and completing a successful build:
$ heroku run python manage.py migrate
Let's open the live version of the application. You can do this through your account on Heroku or by running this command in the terminal:
$ heroku open
Please visit the deployed application on Heroku honeyDo-django and feel free to submit comments or improvements via an issue in the honeyDo-django GitHub Repo. For more tutorials and applications, please check out my website spiano.dev.